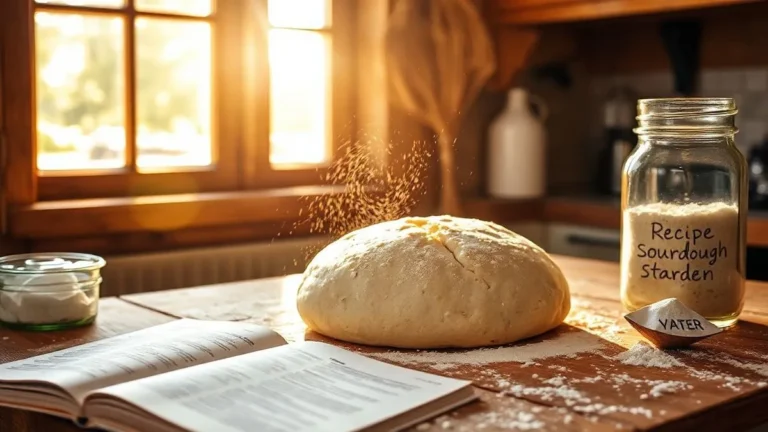
Sourdough bread has a magical quality that brings a warm smile with its chewy, rustic crust and tangy flavor. Making it at home isn’t just any baking project; it’s a fun journey. Plus, it’s totally doable, and you don’t need to be a pro. Ready? Let’s dive into this journey together!
What is Sourdough Bread?
Sourdough bread is made through a process that uses wild yeast and lactic acid bacteria. This combo gives it that distinct tangy flavor and airy texture. Unlike regular bread that uses commercial yeast, sourdough takes a bit longer to rise, but the wait is totally worth it!
Why Choose Sourdough?
- Health Benefits: Sourdough is easier on digestion due to its natural fermentation process. It also has a lower glycemic index, meaning it’s better for your blood sugar.
- Flavor Explosion: That tangy flavor? It comes from the wild yeast and bacteria at work. The longer you ferment, the more flavor you get!
- Customizable: You can mix in different flours, seeds, or even herbs to make it uniquely yours.
Getting Started: Ingredients You’ll Need
Here’s the rundown on the basics you’ll need. Remember to stick with halal-friendly options.
Essential Ingredients
- Flour
- All-purpose flour or bread flour.
-
You can experiment with whole wheat or rye flour for a different taste.
-
Water
-
Use filtered or bottled water if your tap water has a strong taste or chemicals.
-
Salt
-
Regular table salt or sea salt. It adds flavor and helps with fermentation.
-
Sourdough Starter
- This is the magic mix of flour and water that captures wild yeast. You can make your own or get some from a friend.
Optional Add-Ins
- Seeds (like flaxseeds, sunflower seeds)
- Dried Herbs (like rosemary or thyme)
- Nuts (like walnuts for a crunchy twist)
Step-by-Step Guide to Making Sourdough Bread
1. The Sourdough Starter
Making your starter is the first step! Here’s a simple way to create it.
Ingredients for the Starter
- 1 cup of all-purpose flour
- 1/2 cup of water
Instructions:
- Mix: Combine the flour and water in a jar. Stir until there are no dry bits.
- Cover: Put a kitchen towel over the jar (don’t seal it tight). This keeps dust out while letting air in.
- Let it Sit: Place in a warm spot (around 75°F/24°C) for about 24 hours.
- Feed It: Each day, discard half and add 1 cup of flour and 1/2 cup of water. Keep doing this for about 5–7 days. You’ll see bubbles—this means it’s working!
2. Making the Dough
Once your starter is bubbly and has doubled in size, it’s time to make the dough.
Dough Ingredients
- 1 cup sourdough starter
- 4 cups all-purpose flour
- 1 1/2 cups of water (room temperature)
- 2 teaspoons salt
Steps:
-
Mix: In a big bowl, mix the starter and water until combined. Then add flour and salt. Stir until it forms a shaggy dough.
-
Knead: Turn the dough onto a floured surface. Knead for about 10 minutes until it’s smooth and elastic. This action helps develop gluten, which traps those lovely bubbles!
-
First Rise: Put the dough in a lightly greased bowl. Cover it with a kitchen towel. Let it sit for 4-6 hours until it doubles in size.
3. Shaping and Second Rise
Shaping the Dough
-
Gently Punch: Once it’s doubled, gently punch it down to release air.
-
Shape: Turn it out onto a floured counter and shape it into a round or oval loaf.
-
Second Rise: Place it in a proofing basket or bowl lined with a floured towel. Cover and let rise for another 2-4 hours.
4. Baking Your Bread
Preparing to Bake
-
Preheat Your Oven: Set the oven to 450°F (230°C) with a Dutch oven inside. This helps create steam, giving your loaf that crusty exterior.
-
Score the Bread: Just before baking, use a sharp knife to make a few shallow cuts on top. This helps it expand in the oven.
Baking
-
Transfer: Carefully take the Dutch oven out and lift the dough in, letting it drop. Be cautious—it’s hot!
-
Bake: Cover with the lid and bake for 30 minutes. Then, remove the lid and bake for another 15-20 minutes until the crust is golden brown.
5. Cooling and Enjoying
Let the bread cool on a wire rack for at least 1 hour before slicing. This is the hardest part! The aroma will tease you, but trust us—it’s worth the wait for perfect slicing.
Tips for Sourdough Success
- Patience is Key: Don’t rush the fermentation process. It takes time, but good things come to those who wait!
- Temperature Matters: Keep an eye on your room temperature. If it’s too cold, your dough might be slow to rise. Too warm, and it can rise too quickly.
- Experiment: Play around with different flours, hydration levels, and add-ins. It’s all about finding your perfect loaf!
FAQs About Sourdough Bread
How Long Does Sourdough Bread Last?
If stored in a paper bag at room temperature, it should last about 3-5 days. For longer storage, slice and freeze it!
Can I Make Sourdough Gluten-Free?
Absolutely! Replace all-purpose flour with a gluten-free blend. You might need to adjust the water content as gluten-free flours act differently.
What If My Bread Doesn’t Rise?
If your dough doesn’t rise, check if your starter is active. If there’s no bubbling, it needs more feeding. But don’t worry too much; it happens to the best of us!
Can I Skip the Sourdough Starter?
You can’t really make classic sourdough without a starter! If you need a quicker option, look up no-knead bread recipes that use instant yeast.
Conclusion: Your Sourdough Adventure Awaits
Ready to give this a shot? By following these steps, you’ll be well on your way to making delicious sourdough bread. Remember, it’s all about having fun and experimenting with flavors. So, roll up your sleeves, grab your apron, and let’s get baking!


