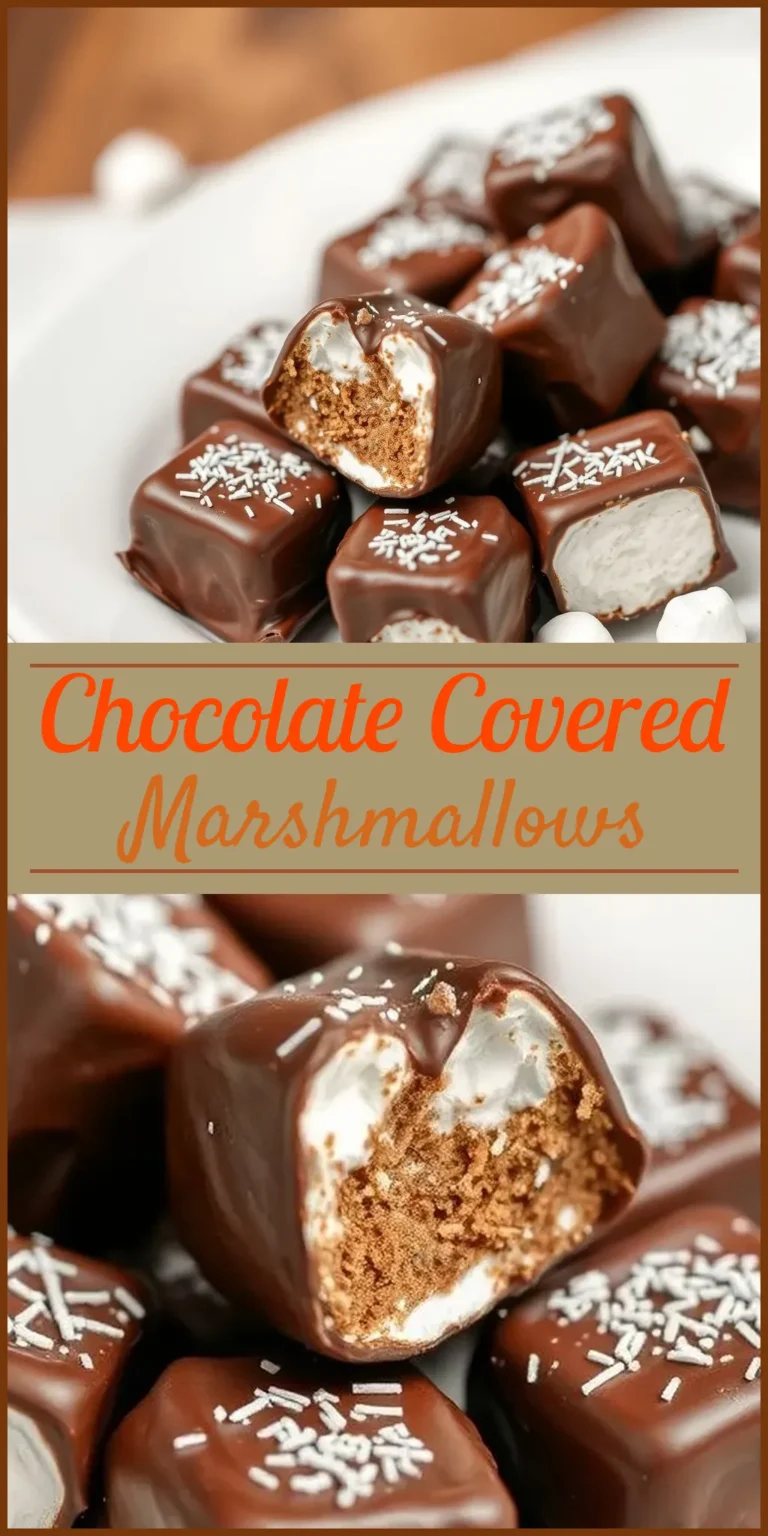
Chocolate Covered Marshmallows: A Complete Guide
There’s something timeless about the simple combination of soft marshmallows wrapped in smooth chocolate. Chocolate covered marshmallows transform a basic treat into an eye-catching delight that appeals to adults and children alike. Whether you want a quick treat to make with kids or a festive party favor, this recipe is adaptable, flavorful, and fun from start to finish. Let’s dive into every detail, from ingredients and preparation to creative decorating and long-term storage.
Why Make Chocolate Covered Marshmallows?
Simplicity, versatility, and taste all come together here. With only a handful of basic ingredients, you can create a batch in less than an hour. Adapt the toppings, chocolate, and presentation to suit any occasion—birthdays, holidays, or even just an afternoon snack. There’s no need for special skills or equipment, and cleanup is easy. And unlike more elaborate candies, marshmallows stay chewy and tender for days beneath their chocolate coat.
Choosing Your Ingredients
A treat this straightforward calls for quality components. Here’s what you’ll need and how your choices affect the final result.
Marshmallows
- Size: Large or jumbo marshmallows strike the right balance. Mini marshmallows work for clusters, but they’re less visually striking and can be tricky to dip.
- Type: Store-bought marshmallows are consistent in size, but homemade marshmallows bring extra flavor and a softer texture. Cut homemade marshmallows into squares or rounds for an artisanal look.
Chocolate
- Type: Milk, dark, or white—each brings a distinct sweetness. Dark chocolate yields a rich, slightly bitter contrast with the marshmallow, while milk chocolate is creamy and sweet.
- Form: Baking bars melt more smoothly than chocolate chips, which contain stabilizers. If using chips, choose those labeled “best for melting.”
- Quality: Use chocolate you’d enjoy on its own. Higher cocoa content in dark chocolate adds depth; for sweeter treats, stick with milk or a blend.
Stabilizers (Optional)
- Coconut oil: A spoonful helps chocolate melt evenly and remain glossy.
- Vegetable shortening: Works similarly, though it lends less flavor than coconut oil.
- Both prevent chocolate from seizing or turning grainy during melting.
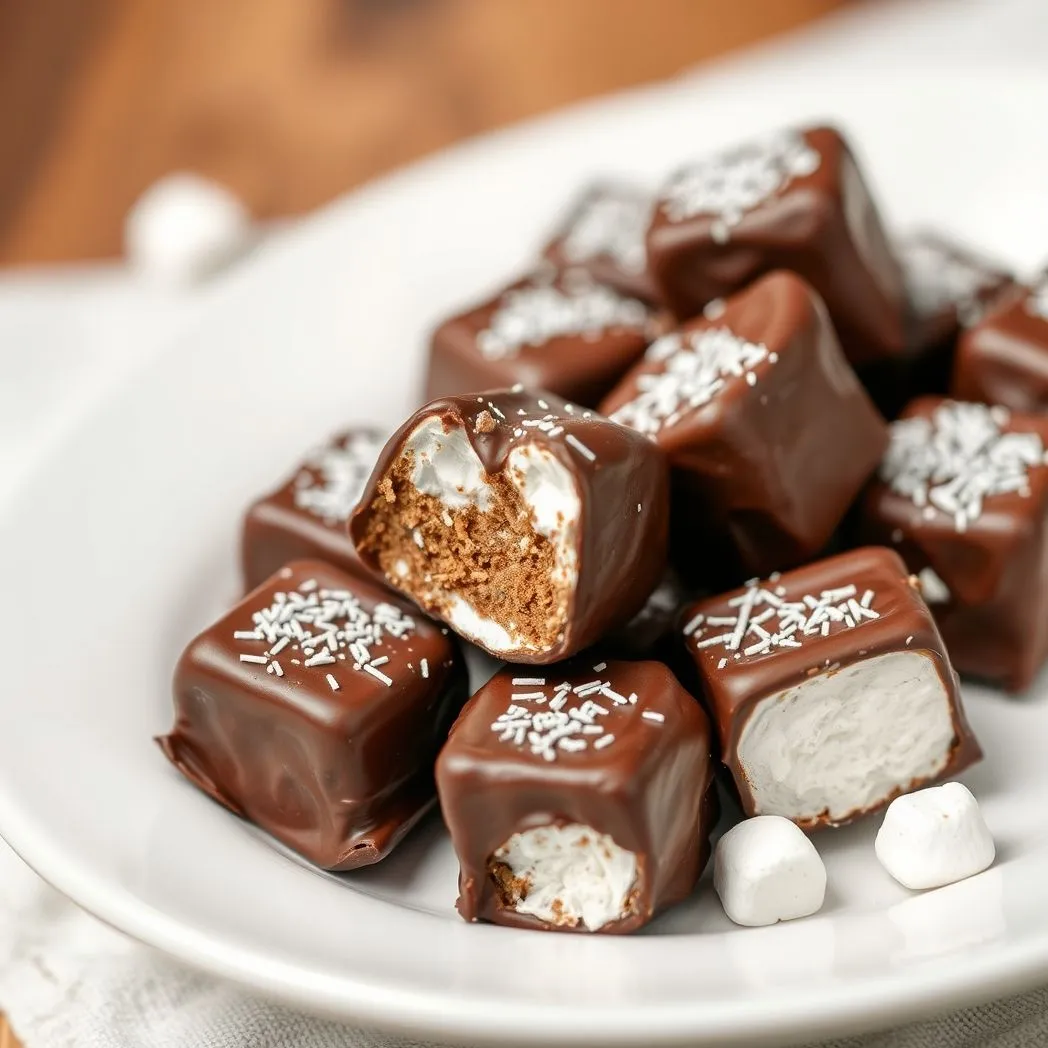
Toppings
- Sprinkles: Bring color and crunch.
- Crushed nuts: Try pistachios, almonds, or peanuts for a savory twist.
- Candies: Chopped toffee, mini chocolate chips, or crushed candy bars pair well with chocolate and marshmallow.
- Seasonal extras: Use crushed peppermints for winter, pastel sprinkles for spring, or colorful candy for birthdays.
Equipment and Tools
- Microwave-safe bowl or double boiler (for melting chocolate)
- Baking sheet lined with parchment or wax paper
- Lollipop sticks, skewers, or pretzel rods for dipping and serving
- Shallow bowls for toppings
- Cooling rack (optional)
- Styrofoam block or heavy mug (to set marshmallows upright while chocolate sets)
Step-by-Step Instructions
1. Set Up Your Workspace
Lay out all of your ingredients and tools before you start. Pour toppings into shallow bowls or plates. Line a baking sheet with parchment paper. If you plan to let the marshmallows set upright, prepare a styrofoam block or similar holder and poke small holes ahead of time.
2. Melt the Chocolate
Cut chocolate into small, even pieces if using bars. In a microwave-safe bowl, combine the chocolate and coconut oil or shortening (about 1 tablespoon per 8 ounces of chocolate). Heat in 30-second bursts, stirring well between each interval, until the chocolate is completely smooth and glossy. If using a double boiler, melt chocolate over low heat, stirring gently.
Tip: Avoid all traces of water in your bowl, as even a drop can cause the chocolate to seize.
3. Skewer the Marshmallows
Gently push sticks or skewers about halfway into the base of each marshmallow. For a sweet-salty variation, use skinny pretzel rods instead. Avoid pushing all the way through, as this can cause the marshmallow to split.
4. Dip the Marshmallows
Hold each marshmallow by the stick and dip it into the melted chocolate, covering it about two-thirds of the way up. Allow any excess chocolate to drip back into the bowl. For a neater finish, tap the stick gently on the edge.
5. Decorate
While the chocolate is still wet, sprinkle with your chosen toppings. Hold the marshmallow over a bowl to catch any falling bits and ensure even coverage. For layered decorations, let the first topping set for a few seconds before adding more.
6. Set and Chill
Place covered marshmallows upright in your styrofoam block or lay them flat on the lined baking sheet. Transfer to the refrigerator for about 20 minutes, or until the chocolate is fully set and no longer sticky to the touch.
Optional: If you prefer a double-dipped effect, repeat the dipping process after the first coat has set completely.
Decorating Ideas and Variations
Creativity shines in the finishing touches. Here are a few suggestions to inspire your own flavor combinations:
| Topping | Flavor Profile | Occasions |
|---|---|---|
| Rainbow sprinkles | Sweet, crunchy | Birthdays, celebrations |
| Crushed peppermint | Cool, refreshing | Holidays, winter parties |
| Mini chocolate chips | Extra chocolatey | Year-round |
| Toasted coconut | Nutty, tropical | Summer, beach themes |
| Sea salt flakes | Salty-sweet contrast | Adult parties, gifting |
| Edible glitter | Sparkly, festive | Weddings, baby showers |
| Graham cracker crumbs | S’mores-inspired | Campouts, casual gatherings |
Mix and match toppings for different tastes and seasons. Drizzle with contrasting chocolate—white on dark, dark on milk, or simply a zig-zag pattern for artistic flair.
Presentation Tips
Chocolate covered marshmallows become even more appealing with thoughtful presentation:
- Place in mini cupcake liners for serving on a dessert tray.
- Wrap individually in cellophane with a ribbon for party favors or gifts.
- Bundle in clear treat bags for bake sales.
- Arrange upright in a mug or vase for a festive centerpiece.
For special occasions, coordinate toppings and ribbons to match the color scheme of your event.
Storing and Shelf Life
Freshly made chocolate covered marshmallows keep their best texture and flavor with careful storage:
Refrigerator Storage
- Once chocolate is set, transfer marshmallows to an airtight container.
- Layer with wax or parchment paper between layers to minimize sticking.
- Refrigerate for up to one week.
Freezing
- Freeze in a single layer on a baking sheet until solid.
- Transfer to a freezer-safe bag or container, separating layers with parchment.
- Store in the freezer for up to three months.
- To serve, thaw overnight in the refrigerator. Avoid microwaving, which can melt the chocolate unevenly.
Troubleshooting Tips
Even simple recipes can go awry. Here’s what to do if something isn’t quite right:
- Chocolate is too thick: Add a small spoonful of coconut oil or shortening and heat gently.
- Marshmallows slide off sticks: Push the stick further in, but not through. Lightly score large marshmallows with a small knife if needed for grip.
- Chocolate cracks after chilling: Let the marshmallows come closer to room temperature before refrigerating.
Frequently Asked Questions
Can I use vegan marshmallows and chocolate?
Absolutely. Substitute any plant-based alternatives; most melt and set just as reliably.
How far in advance can I make these?
Up to a week ahead if stored in the fridge, or freeze for even longer storage.
What’s the best way to keep the coating shiny?
Coconut oil helps produce a glossy finish. Avoid over-chilling, which can dull the chocolate’s appearance.
Chocolate covered marshmallows marry flavor and fun in every bite. Experiment with chocolates and toppings, get the family involved, and share them as gifts or party treats. With a few key steps and a little imagination, you’ll turn a classic combination into a memorable (and delicious) homemade treat.
Chocolate Covered Marshmallows
I should warn you: these chocolate covered marshmallows are dangerously addictive! They are fun and sweet. They are perfect for parties. They are also great for gift-giving.
Ingredients
- Optional Toppings: crushed nuts, sprinkles, toffee bits, sea salt, crushed candy canes, etc.
- 10 ounces high-quality chocolate (dark, milk, or white)
- 35 lollipop or cake pop sticks, optional
- 1 bag large or jumbo marshmallows (about 35 marshmallows)
- 2 tablespoons coconut oil or vegetable shortening
Instructions
- Place the chocolate and coconut oil in a microwave-safe bowl. Microwave in 30-second intervals. Stir well between each spin. Continue until the mixture is smooth and shiny.
- Dip Method 1: Use a fork or skewer to dip the marshmallows into the chocolate. Dip them either halfway or fully submerged. Allow excess chocolate to drip off. Carefully transfer them to the baking sheet. Sprinkle over any desired toppings.
- Dip the tips of 35 lollipop or cake pop sticks into the melted chocolate. Insert each stick into a marshmallow. Repeat until all the marshmallows have sticks. Let the chocolate set. Use the stick to dip the marshmallow into the chocolate. Stand the dipped marshmallows upright on the baking sheet or insert the ends into a styrofoam block. Add any desired toppings while the chocolate is still wet.
- When all the marshmallows are dipped and decorated, place the tray into the fridge. Chill for 15-20 minutes or until the chocolate is hard. Serve and enjoy!