Thumbprint Cookies
If you crave a cookie that’s simple to make yet always a crowd-pleaser, thumbprint cookies stand out for their unique charm and delicious versatility. With delicate, buttery crumb and eye-catching jewel-like centers, these classic cookies bring nostalgia and flavor to any table. In this comprehensive guide, you’ll find not just a practical recipe but also in-depth tips, creative variations, troubleshooting advice, and clear storage instructions to ensure your thumbprint cookies always impress.
Why Thumbprint Cookies Are a Timeless Favorite
There’s a reason thumbprint cookies retain their popularity across generations. Their appeal lies in the perfect balance of textures and flavors. The outside bakes up just crisp enough to hold its shape, while the inside remains soft for a melt-in-your-mouth experience. Each cookie carries a punch of jam or filling, offering both sweetness and color in every bite.
Not only are thumbprint cookies delicious, but they’re also highly adaptable:
– Personalized Flavors: Choose your favorite jam—strawberry, raspberry, apricot, or even orange marmalade. Swap in lemon curd or a dollop of Nutella for a twist.
– Seasonal Flair: Roll the dough in colored sugars or chopped nuts to tailor them for holidays and celebrations.
– Make-Ahead Friendly: Both the dough and baked cookies freeze beautifully, making them a smart choice for busy schedules.
These cookies are as fitting on a holiday platter as they are at a casual weekend tea. Their small size and bright centers turn ordinary dough into edible gems.
Ingredients
Great thumbprint cookies rely on quality ingredients. Here’s a breakdown, including why each is used and possible substitutions:
| Ingredient | Purpose | Alternatives / Tips |
|---|---|---|
| All-purpose flour | Structure and body for the dough | Substitute up to 1/4 with almond flour for extra flavor |
| Cornstarch | Adds tenderness, prevents toughness | Optional, but improves texture |
| Unsalted butter | Rich, buttery flavor; essential | Use European-style for extra richness |
| Granulated sugar | Sweetness and structure | Cane sugar works, but avoid coarse sugar |
| Light brown sugar | Adds moistness and a hint of caramel | Use dark brown sugar for deeper flavor |
| Salt | Balances and enhances sweetness | Fine sea salt disperses best |
| Egg yolk | Adds richness, tenderness | No need for the whole egg—yolk only! |
| Vanilla extract | Rounds out flavor | Almond extract gives a different profile |
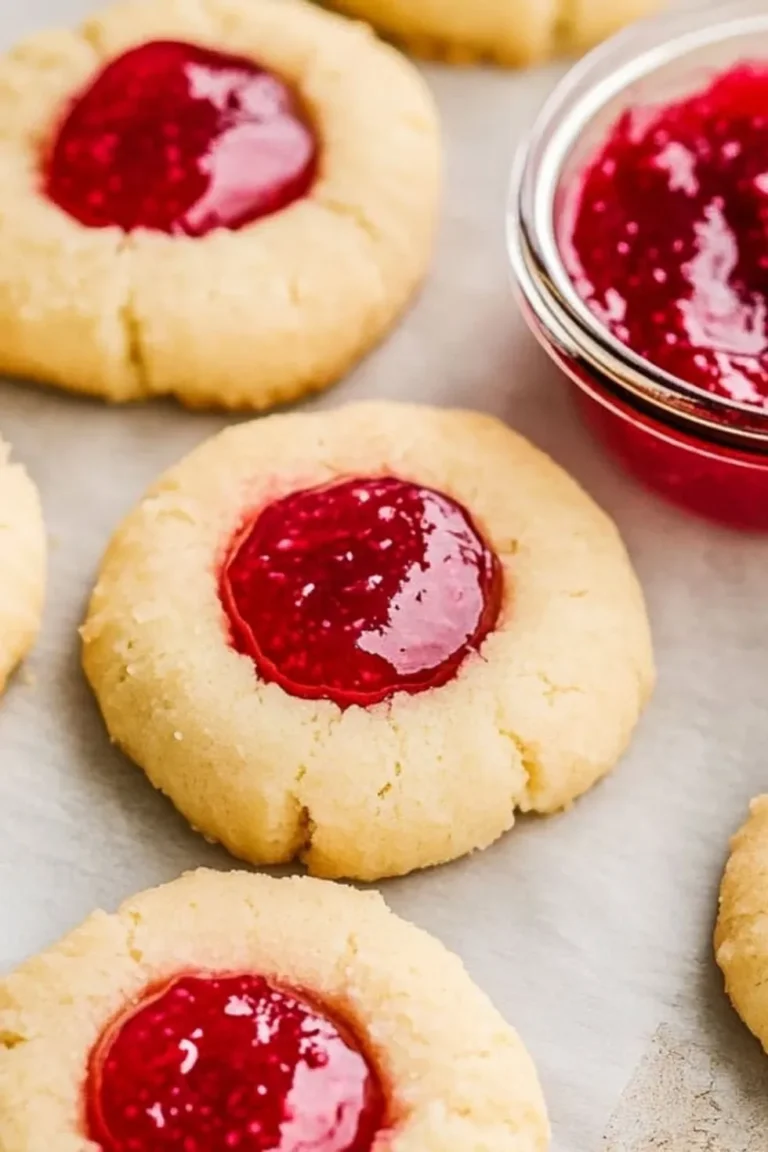
| Fruit jam | Center filling; adds color and tang | Use seedless jams or curds as desired |
Tip: Stick to high-quality fruit preserves or jams. Too runny, and the filling will leak during baking; too stiff, and the flavor payoff drops.
Instructions
Follow this step-by-step guide for flawless thumbprint cookies.
1. Prepare the Dough
Start by whisking together your dry ingredients—flour, cornstarch, and salt. In a separate bowl, use a mixer to cream the softened butter, granulated sugar, and brown sugar. Mix until very pale and fluffy—this step incorporates air, giving the cookies their characteristic lightness.
Blend in the egg yolk and vanilla. Scrape down the bowl to ensure everything combines evenly.
Gradually blend in the flour mixture on low speed (or by hand) until a soft, cohesive dough forms.
2. Shape and Fill
Scoop small portions of dough—about 1 tablespoon each—and roll between your hands to form smooth balls. Roll the balls in a little extra granulated sugar for a crisp, sparkly finish.
Place the cookies on a parchment-lined tray, spaced about 2 inches apart. Using your thumb or the handle of a wooden spoon, press a shallow indentation into the center of each cookie. The well should be deep enough to hold filling but not so deep that the cookie cracks at the edges.
Spoon a scant 1/2 teaspoon of your chosen jam or filling into each indentation.
3. Chill
Chilling is crucial for perfect texture and even spreading. Refrigerate the unbaked, filled cookies on the tray for at least 1 hour. This step helps the dough relax and prevents excessive spreading, keeping edges defined and centers thick.
4. Bake
Preheat your oven to 350°F (175°C).
Bake the cookies straight from the fridge for 10-12 minutes, or until the edges are lightly golden. Avoid overbaking; the cookies should remain soft in the center.
Cool the cookies on the baking sheet for 5 minutes before transferring them to a wire rack.
Tips for Success
Getting the details right makes these cookies more than the sum of their parts. Here are refined techniques and ideas to ensure the best results every time:
- Butter Temperature: Butter should be softened but not greasy. Aim for just pliable. Too warm, and the dough will spread too much.
- Even Sizing: Use a cookie scoop for consistent portioning, which prevents under- or overbaking.
- Pressing Technique: If indents start to disappear as the dough chills, gently press again before baking.
- Jam Choices: Seedless raspberry or apricot jelly is classic, but try apple butter or citrus curd for something new.
- Prevent Leaks: Avoid overfilling—the jam can bubble over. Less is more.
- Flavor Additions: Add a pinch of cardamom or finely grated citrus zest to the dough for extra dimension.
- Nutty Coating: For a different texture, roll dough balls in finely chopped pecans or hazelnuts before pressing and filling.
- Chocolate Variation: After baking, pipe a swirl of chocolate ganache or dulce de leche into the wells.
Troubleshooting Guide
Sometimes, even classic recipes throw a curveball. Here’s how to handle common pitfalls:
| Problem | Likely Cause | Fix |
|---|---|---|
| Cookies spread too much | Dough too warm, not enough chilling | Always chill after shaping and filling |
| Edges crack deeply | Indent pressed too forcefully | Use gentle, gradual pressure when shaping |
| Filling leaks or burns | Overfilled or runny jam | Use thick jam and measure carefully |
| Tough/Dense cookies | Overmixed dough or compacting | Mix gently; stop at just-combined stage |
| Pale, underdone cookies | Oven running cool, short baking | Check with oven thermometer, add 1-2 minutes |
Flavor Variations
You don’t have to stick to just fruity centers. Think of the base dough as a canvas and explore new combinations:
- Cocoa Thumbprints: Add 2 tablespoons cocoa powder to the flour for a chocolate version.
- Spiced Thumbprints: Blend in a touch of cinnamon, nutmeg, or chai spices.
- Savory-Sweet: Fill with a tangy tomato jam and sprinkle with sea salt.
- Peanut Butter Twist: Swap half the butter for peanut butter and fill with grape jelly for a playful nod to PB&J.
- Caramel Centers: Drop in a bit of caramel sauce after baking and let set.
Storing and Freezing
Thumbprint cookies keep well, making them a favorite for planning ahead or gifting.
Storing
Place cooled cookies in an airtight container. If stacking, separate layers with parchment or wax paper to protect the jam centers. Store at room temperature for up to 5 days. In humid climates, refrigerate to keep the jam set and the texture snappy.
Freezing
Both formed, unbaked dough balls (without jam) and baked cookies freeze beautifully.
- Freeze unbaked: Arrange shaped (unfilled) cookies on a tray until solid, then transfer to a freezer bag. When ready to bake, defrost slightly, press wells, add filling, and bake as usual.
- Freeze baked: Place cooled cookies in a single layer, freeze, then store in a container for up to 3 months. Thaw at room temperature. The texture remains tender, and the jam regains its gloss.
Serving and Gifting
Thumbprint cookies make thoughtful gifts or cheery additions to dessert tables. Arrange in a box with dividers or nestle into mini cupcake liners to keep them pristine.
Pair a batch with tea or coffee for a homestyle touch. During the holidays, match jam colors to the season—red for winter festivities, gold for autumn gatherings.
Essential Equipment
- Mixing bowls
- Hand or stand mixer
- Parchment or silicone baking mats
- Small cookie scoop or spoon
- Wire rack
- Measuring cups and spoons
- Baking sheets
Having the right tools helps with consistent results and stress-free baking.
Every batch of thumbprint cookies brings its own satisfaction. Whether you choose traditional raspberry, experiment with curds or nut spreads, or dress them up for seasonal occasions, these cookies deliver on taste, beauty, and ease. Their familiar shape and sweet center never go out of style, making them a kitchen staple through generations.
Ready your favorite jam, gather your pantry basics, and enjoy the simplicity and flavor of these classic thumbprint cookies baked right at home.
Thumbprint Cookies
Sweet, buttery thumbprint cookies filled with your favorite jam are the perfect bite-sized treats. They’re great for any occasion. And they’re so easy to make!
Ingredients
- 2 1/4 cups all-purpose flour
- 1/2 teaspoon salt
- 1/2 cup granulated sugar, divided
- 2 teaspoons vanilla extract
- 1 large egg yolk
- 1/2 cup jam
- 2 teaspoons cornstarch
- 1 cup unsalted butter, room temperature
- 1/2 cup light brown sugar, packed
Instructions
- In a medium bowl, whisk the flour, cornstarch, and salt. Set aside.
- In a large bowl, beat the butter, brown sugar, and 1/4 cup of granulated sugar with an electric mixer on medium speed until light and fluffy, about 2-3 minutes. Blend in the egg yolk and vanilla until smooth.
- Stir the flour mixture in by hand until just combined. The dough will be crumbly at first but will come together as the mixing continues.
- Scoop rounded tablespoons of dough and roll into 1-inch balls. Roll each ball in the remaining 1/4 cup of granulated sugar until well coated (optional). Place the cookies on a parchment-lined baking sheet.
- Use your thumb or the handle of a wooden spoon to create an indent in the center of each cookie. Spoon about 1/2 teaspoon of jam into the space. Place the tray in the fridge for at least an hour or in the freezer for 30 minutes.
- Preheat the oven to 350 degrees Fahrenheit and line another baking sheet with parchment paper.
- Arrange the cookies over the baking sheets with 1-2 inches between them. Bake for 10-12 minutes, until the edges are lightly golden brown. Let the cookies cool on the baking sheets for 5-10 minutes before transferring to a wire rack to cool completely. Enjoy!